 Let’s just say that I’m not joking when I say that I could kiss these bracelets on the lips. I made these this past weekend and you know what? It was fun and easy! YES! What else do you need to know? Oh you want to know how to make wire wrapped bracelets for yourself? Done.
First you need to gather supplies. This turned out to be a little more difficult that I would have liked. I went to Hobby Lobby first but they had no beads that would work for this project but they did have the gold wire I wanted to use. So I decided not to buy anything at Hobby Lobby and snake my way over to Michaels Arts and Crafts in the world’s worst Saturday traffic.
Michaels had a much better selection of beads but they were out of the gold wire that I really wanted.
 So I compromised and got gold wire that’s for general jewelry use, not just bracelets. The difference is really that the bracelet wire is already sold in large circles so you don’t have to worry about getting the wire straight like you might if it’s on a small spool. But I didn’t have any problems at all and I actually got more wire on the spool for less money than if I had bought the wire specifically for bracelets.
You need –
20 gauge wire.
Needlenose pliers
wire cutters
medium sized beads/ crystals
a cup to shape your bracelet on
These bracelets are going to a friend who recently graduated from a college that had red and yellow as their school colors. My plan was to buy red and yellow crystal beads and use those but these long red beads are the only red ones that were the right size to work.
If you really want to do the true crystal look that’s so popular right now, I recommend buying the beads online or going to a local bead store.
Start making the bracelets by measuring out about 3 feet of wire and pulling it straight.
Use another bracelet to determine the correct size you want or very loosely measure around your wrist, giving room for the bangle to hang on your wrist. Now turn the glass upside down and find the same measurement on the taper of the glass. Mark it using tape or a hair tie so that you can have consistent sizes.
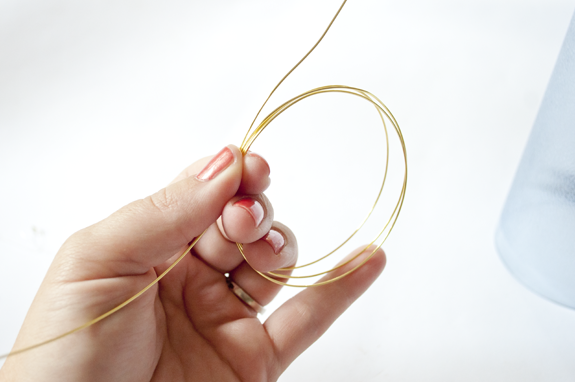
Leaving the first 10 or more inches free, wind the wire around the glass to make the correct shape and form for your bracelet.
 If you look you can see that the beginning of the piece of wire and the end are both free.
 Now you need to carefully slide the wire off of the glass while holding it tightly to keep it together! The first time or two will be tricky but don’t give up.
 Use your pliers to make a 90 degree angle with one free end of the wire. This is where you’re going to start wrapping. Wrap it around the other wires at least 3 times. After I made a few of these bracelets I decided that I like the look of 4 wraps. It’s up to you.
 Keep the wires together or push the sides of the wrap together using your pliers to make a nice neat wrap.
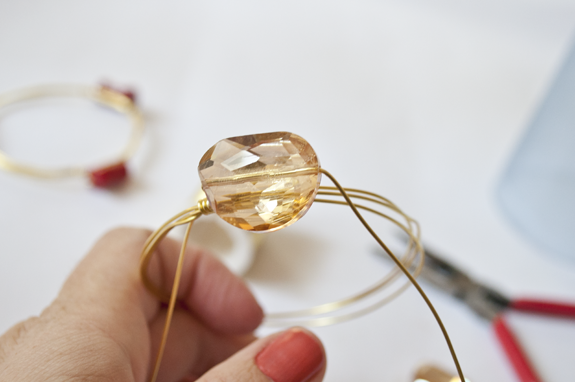
 Now slide a bead onto your free tail of wire and you’re going to wrap the other side to hold the bead in place.
 Wrap the wire around the wire bracelet on the other side of the bead using your pliers to get a nice neat wrap.
Don’t cut the extra wire! Now you’re going to pull the extra over to the right and start another wrap 1/3 of the way around the bracelet.
 First go to the right to add another bead and then go back to the center stone at go to your left to add the bead using that tail of wire. It’s simple.
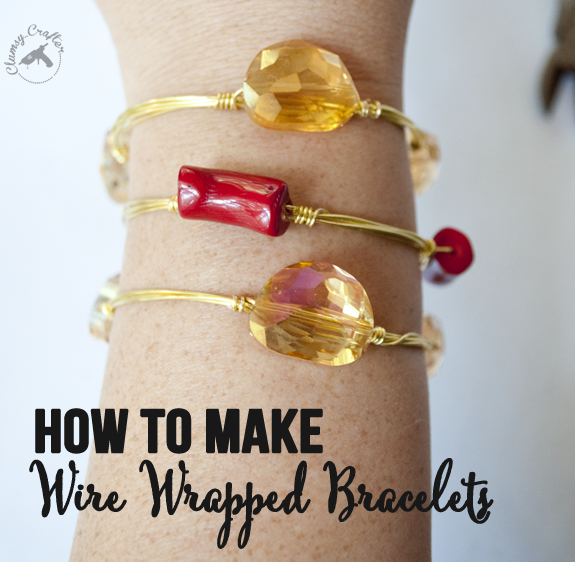
 And when you’re done you’ll have a lovely bracelet with three stones.
Why just three stones? So that you can easily stack more than one together.
 The good news is that you can be a perfectionist and have your wires perfect and straight or you can be artsy fartsy with wires that aren’t all the way in place and either way you get an amazing finished product.
Shiny glittery arm candy – what else can you ask for?


uh, these are ridiculously fabulous! i tried to make myself one last week and it didn’t turn out as easy or neat as your, i totally over complicated it. i’m taking them apart and doing it your way right now!
I have been making jewelry out of copper and spent shells. I would love to try my hand at these bracelets. Can you tell me of a website where I could purchase these type of stones that have the drilled hole? I have search and I can find plenty of beads but I am looking for the pretty stones. Thank you very much for any help that you can provide!
Sincerely,
Deborah
I actually found these at Michaels Crafts.
You mentioned in your tutorial on wire wrapped bracelets that you did not find the wire at Michaels that you prefer, but it was at Hobby Lobby. Can you tell me what that would be before I go shopping? I like your idea and plan to make several. Thank you.
They just didn’t have the gold color that I wanted. They do have it but were sold out.
This is so fab! 😀 love love ♥
I’ve been making jewelry for fun and occasionally selling to friends for a few years. I love the look of these and I am so going to try this soon! (Like tonight!!) I was wondering how you finished the raw edge on the wire? I always end with a pokey bit that I just can’t get rid off!!
I flattened the end as much as I could and then just played with it a lot until I got it where it wouldn’t poke. They’re fun to make! I hope you like it!
Hi Dear,
Thanks for this useful tutorial. I am featuring you here :
http://creativekhadija.com/2016/06/handmade-bangles-bracelets-ideas-eid/
Feel free to grab the featured Button.
Thank You.
Khadija
I can’t get the transition down. A bit frustrating. Mu problem is starting it and transitioning in to another bead.
Just saw this and i love, love, love it! Love me some bling on my wrist! I know feel empowered to make some bracelets!
You can do this! They are so easy!
Bling, bling. Didn’t know that diy bracelet could be such beautiful. Looks like so stunning and neat. Hope i could make one successfully. Thanks for posting such clear how to instruction.